Showing posts with label Change cartridges. Show all posts

Wednesday, 1 June 2016

Change cartridges HP Deskjet 1000 series

Printer Blog >> Help >> Change cartridges HP Deskjet 1000 series

HP Deskjet 1000 series


Change printer cartridges HP Deskjet 1000, Deskjet 1010, Deskjet 1050, Deskjet 1510, Deskjet 1512, Deskjet 1515.

To change printer cartridges HP Deskjet 1000 series you can follow the instructions in the manual that includes or perform the following steps:


Hp Deskjet 1050

Steps to change the ink cartridges


  • Verify that the printer is connected and that paper. In order to change the printer cartridge correctly must be like if you were to print.
  • Open the cartridge door is at the front. You will see that the car with the cartridges will begin to move to move to the center. Expected to stay standing in the center to remove the cartridges.
  • Press down the cartridge gently until you feel disengages. Sometimes it takes a bit but can usually be easily removed, I remove it from its slot.
  • Open the new cartridge and carefully remove the protective tape. This usually takes a striking and directions on how to remove color. It serves to protect the head cartridge because in these models is integrated. Try not touch the head or contacts, as dirt can cause the cartridge to malfunction.
  • Insert the new cartridge until you hear a click. Make sure you're getting in the right place. If you're trying to get the cartridge and see that you do not fit, try to get him into the next slot because it can not be that your site :-).
  • Close the cartridge door and wait for the printer to perform their "homework".


Once installed a new cartridge, it is best to take out a print test to verify that it works correctly.

More accurate impression you would like shown below:

Print test HP Deskjet 1000


If you have left you with some color spots or it does not work, then you have to perform head cleaning with printer software or manually.

Remember these steps to clean the heads dela HP printer used for the following models:
HP Deskjet 1000, Deskjet 1010, Deskjet 1050, Deskjet 1510, Deskjet 1512, Deskjet 1515.


How to install the ink cartridges in the Epson Stylus Pro 7880/9880


Printer Blog >> Help >> How to install the ink cartridges in the Epson Stylus Pro 7880/9880

How to install the ink cartridges in the Epson Stylus Pro 7880/9880


Steps to install the ink cartridges


Epson Stylus Pro 7880/9880Today we'll try to help install the ink cartridges in the Epson Stylus Pro 7880 printer and plotter 9880. These are for professional use and are very well received by those who are engaged in the printing of posters, brochures, etc. Epson offers very good picture quality in almost all printers thanks to the technology used in their cartridges and ink type.

If you are printing large jobs it is better check before the ink levels because you can stay with the job half done, unless you have a replacement cartridge.


When i have to change the ink cartridge?

Thanks to the LCD screen of these plotters can see the 8 slots corresponding to each of the ink cartridges indicating percentage of remaining ink. When the red ink (teardrop) is flashing and the message that "low on ink" is when you have to start preparing a replacement cartridge appears on the screen.
When the red light is on permanently on the screen the message you replace the cartridge so it is displayed when you have to replace it


How to change the ink cartridge


  • The first thing you have to do is give the power button.
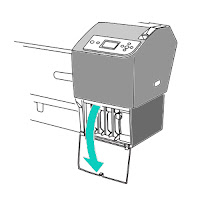
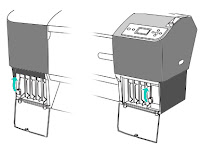
  • Then you must open the cover of the ink cartridges down and up the levers up to unlock the cartridges.


Epson Stylus Pro 7880/9880 change cartridgesEpson Stylus Pro 7880/9880 change cartridges

Source: https://files.support.epson.com/pdf/pro7880/pro7880gd6.pdf

  • Remove the ink cartridge in the printer that are about to change.
  • Take out the new ink cartridge from its packaging and shake.
  • Epson Stylus Pro 7880/9880 change cartridges
  • Source: https://files.support.epson.com/pdf/pro7880/pro7880gd6.pdf
  • Insert the ink cartridge and verify that the printer has detected across the LCD.
  • After installing the ink cartridge, lower the ink lever. The printer starts charging the ink delivery system and the power indicator is flashing.

That is all! We have prepared our plotter to print our wonderful work!


Original post: Cómo instalar los cartuchos de tinta en la Epson Stylus Pro 7880/9880

Tuesday, 10 May 2016

How to change printer cartridges dela DCP-J132W Brother

Printer Blog >> Help >> How to change the printer cartridges of Brother DCP-J132W


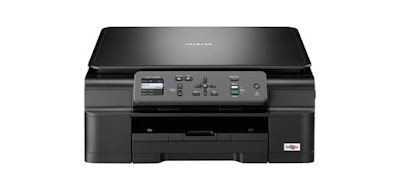
Printer Brother DCP-J132W


Change Printer cartridges Brother DCP-J132W


Want to know how to change cartridges Brother DCP-J153W? Us how:
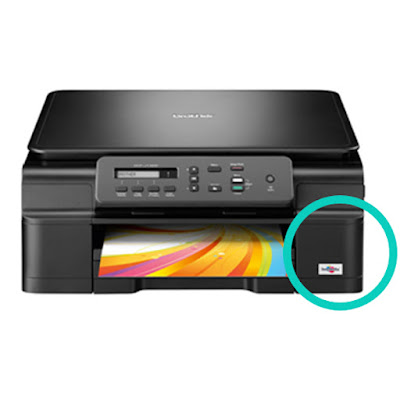
The Brother DCP-J132W printer has four individual ink cartridges. Here we can locate on the right front of the printer:


Brother DCP-J132W

To change we can follow the steps come in the User Guide of the printer or the following:


  • Open the cartridge cover.
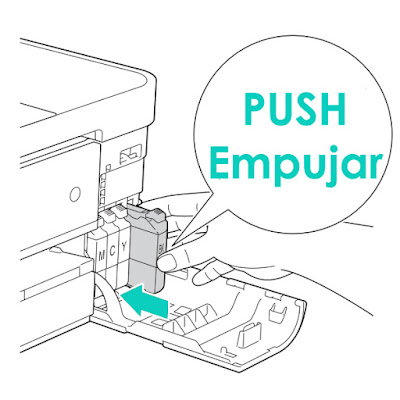
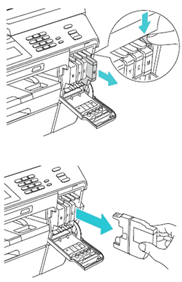
  • Each cartridge has a flange at the top. Simply press the lever to release the lock and the cartridge will.Cartridges Brother DCP-J132W
  • Take the new cartridge and remove all the protections you may have. (Without shaking the cartridge).
  • Insert the cartridge in its corresponding color and gently press the cartridge into until you see the lock lever is lifted.
Cartridges Brother DCP-J132W
  • Close the cartridge cover ... and READY!


You have changed your cartridges Brother printer!


To see de original content click to Como cambiar los cartuchos de la impresora Brother DCP-J132W
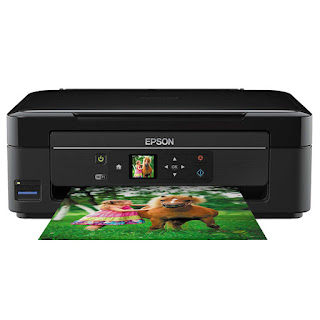
Printer blog >> Help >> How to change cartridges Epson XP-322 printer


Epson XP-322 printer


Change Printer cartridges Epson XP-322

To replace the ink cartridges from the printer you can use the instructions in the manual for your printer or follow the steps below.


Epson XP-322 printer

* First of all, replacing the ink cartridges so you only when prompted by the printer. The printer must be connected and turned as if ready to print.

  • From the LCD screen verifies that the printer cartridges have to be replaced, press the OK button and select "Change Now" on the menu. Another option is to go to menu "Settings" >> "Maintenance" >> "Ink Cartridge Change" and press the blue button.
  • In the case of black ink cartridge, it is recommended to shake a few times before installing.
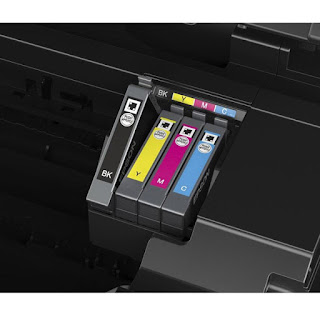
  • Remove the cartridge from the blister and remove solely the yellow tape as shown in the image.
  • Open the top cover to access the cartridges. To remove the cartridge, press the tab and pull it up.

Change cartridges Epson
  • Insert the cartridge into place until you hear a "click" and close the cover up.
  • Press the blue button and ready!


These steps to change the Epson printer cartridges, are also valid for the following models:
Epson XP-102, Epson XP-202, Epson XP-205, Epson XP-212, Epson XP-215, Epson XP-225, Epson XP-30, Epson XP-302, Epson XP-305, Epson XP-312, Epson XP-315, Epson XP-322, Epson XP-325, Epson XP-402, Epson XP-405, Epson XP-412, Epson XP-415.


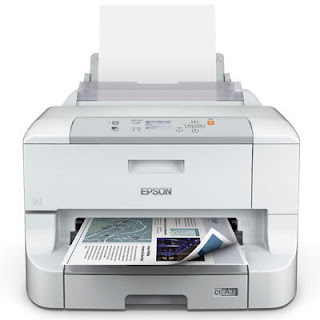
Change Printer cartridge Epson WORKFORCE PRO WF-M5190DW

Home >> Help >> Change printer toner Epson WORKFORCE PRO WF-M5190DW


Replacing the printer cartridge Epson WF-M5190DW

Change Cartridge Epson


If you have a printer of this brand and we have never run out of ink, it is normal to ask ourselves how to put an Epson printer ink, usually in inkjet printers Expression Home is usually quite simple. And replace the ink cartridges in the printer WorkForce M5190 is also very simple, as long as you follow these steps.


Epson WF-M5190DW

Open the front cover, it ie the center of the printer just below the block of the LCD.
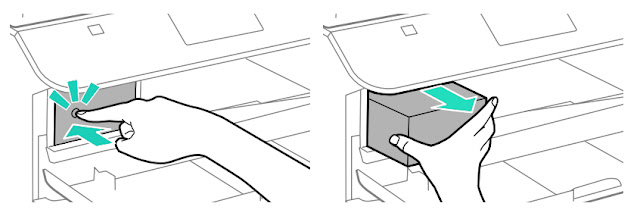
slightly push the ink cartridge you want to replace, it will move just out. Once you get this, remove the ink cartridge.

Change the cartridge Epson WF-M5190DW

Enter the old ink cartridge in a bag or the like, remove the new cartridge packaging but be very careful when removing the wrapper from the new ink cartridge when handling the new cartridge, do not touch the two sensitive devices the following image.

Change the cartridge Epson WF-M5190DW
Shake the cartridge to avoid at any time by a bad product stored ink is less dissolved by any of the inner ends of the ink cartridge.
Insert the ink cartridge into the printer, and when you hear the click of the printer will indicate on the LCD display something like ... "CHECK PRINT. Cart." Then click ok.
Close the front cover you opened in step 1. And print! :-)


How to know the ink level  of Epson WF-M5190DW


If you want to know what level of ink cartridges Epson they have the need to open the "Control Panel" printer. There will access the "Menu" and then choose "Ink level". We know both the level of ink cartridges as the remaining space in the box printer maintenance. The box printer maintenance is another of the "consumables" that must be changed at some point in the life of the printer.

Read the original post at Cambiar cartucho impresora Epson WORKFORCE PRO WF-M5190DW

Change Printer cartridges Canon MG-2555

Home >> Help >> Change Printer cartridges Canon MG-2555

Canon printer MG-2555


Change Printer cartridges Canon MG-2555


All printers usually come with a manual or user guide where are the instructions to change printer cartridges. In the series of Canon MG-2500 you have left at the end of the post the link of all the manuals available so you can download without problems.

Canon MG-2555

You have to change the cartridges when the alarm light blinks orange (error) and the ink lamps at a time.The steps then we will serve you to replace virtually all of Canon's FINE cartridges (two cartridges: one black and one tricolor) type.

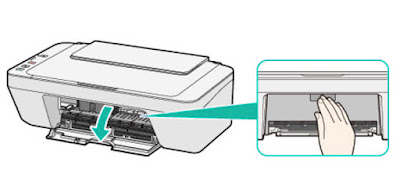
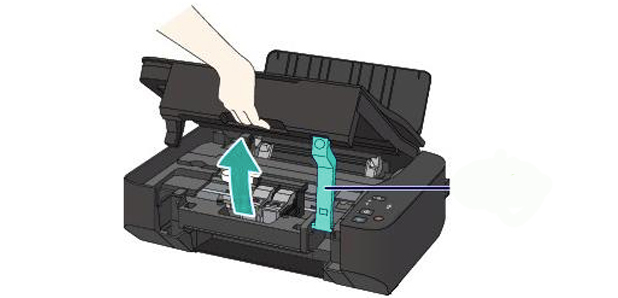
We check that the printer is turned on and connected to the computer.If the paper tray is extended below the close.We open the front cover. To do this we need to pull us and down, as shown in the image below. We'll see how the "car" of the cartridges moves to the center so that we can easily change them.

Cambiar cartuchos impresora Canon MG-2555

  • Remove the cartridge "car." To do this, simply press the end of the cartridge down until it clicks. Do not force or squeeze too, so if you see that it costs a lot of work, maybe you're not doing well.
  • Get the whole cartridge and take the new cartridge. Remember to remove all seals before installing it, because if not, the cartridge will give you problems and will not work perfectly. The seal is usually in the head cartridge.
  • Insert the new cartridge. Make the same movement as when you extracted the other, but in reverse. To lock the cartridge has to make a click.


Cambiar cartuchos impresora Canon MG-2555

Close the front cover. The printer must be ready to print. If the light "alarm" lights orange after installing it ... .you have not done something well: -S. Do not worry and try to do it again.


Check out the original content at Cambiar cartuchos impresora Canon MG-2555

How to change cartridges Canon MX-410 printer

Home >> Help >> How to change cartridges Canon MX-410 printer

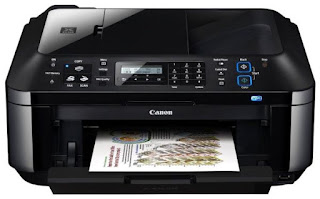
Canon printer MX-410

Change printer cartridges Canon MX-410


Printers usually come with a user guide where you can see the steps to change ink cartridges if you do not have or have lost, you can follow the instructions listed below you.


Canon MX-410


*Change your printer cartridge when prompted only the printer itself. No need to change the two cartridges at a time, only to be depleted.

  • With the printer connected to the computer and the power, check that is on.
  • Open the paper output tray.
  • Lift the top cover (where the scanner is) to access the cartridges.
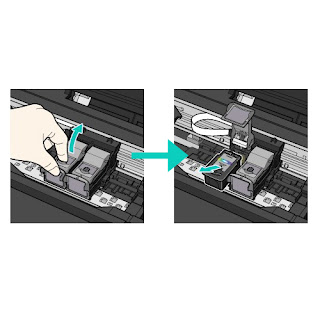
  • Extracts the cartridges as shown in the image. First you have to lift the cover that holds the cartridge and then pull it out.
  • Change printer cartridges Canon MX
  • Take the new cartridge and remove all bearing seals.
  • Install it in the corresponding hole and as such was the other cartridge and close the cartridge cover until it clicks. * It is important that the cover is properly closed and straight to fit.
  • To close the scanner cover you have to lift slightly this and close smoothly.


If you want more information about Canon MX-410 printer can take a look at our review.


These steps to change cartridges Canon MX-410, also serves the following models of Canon printers:

Canon MX-395, Canon MX-475, MX-525 Canon, Canon MX-535, MX-725 Canon Canon Canon MX-895 and MX-925.


Wednesday, 27 April 2016

How to change the Canon MX410 printer cartridges

Home >> Help >> How to change the Canon MX410 printer cartridges

Canon printer MX-410

Change printer cartridges Canon MX-410

Printers usually come with a user guide where you can see the steps to change ink cartridges if you do not have or have lost, you can follow the instructions listed below you.

Canon MX-410
* Change your printer cartridge when prompted only the printer itself. No need to change the two cartridges at a time, only to be depleted.

  • With the printer connected to the computer and the power, check that is on.
  • Open the paper output tray.
  • Lift the top cover (where the scanner is) to access the cartridges.
  • Extracts the cartridges as shown in the image. First you have to lift the cover that holds the cartridge and then pull it out.
Change printer cartridges Canon MX


  • Take the new cartridge and remove all bearing seals.
  • Install it in the corresponding hole and as such was the other cartridge and close the cartridge cover until it clicks. * It is important that the cover is properly closed and straight to fit.
  • To close the scanner cover you have to lift slightly this and close smoothly.

If you want more information about Canon MX-410 printer can take a look at our review.

These steps to change cartridges Canon MX-410, also serves the following models of Canon printers:
Canon MX-395, Canon MX-475, MX-525 Canon, Canon MX-535, MX-725 Canon Canon Canon MX-895 and MX-925.


Look at the original post in Consejos Impresoras

Canon Pixma MP230 Change Cartridges


Home >> Help >> Change Cartridges Canon Pixma MP230


Canon MP-230 Printer


Change printer cartridges Canon Pixma MP-230


Canon MP-230When we have to change cartridges Canon Pixma MP230 our, it is very important not to touch the connectors because it can damage them. Connectors are a metal chapita also known as "chip" if, for example, this chip is dirty or damaged, it can cause the printer not detected properly and the cartridge unusable stay.


The cartridges are changed when the printer throws a warning via computer or if you have, through your screen. This printer uses two ink cartridges, one black and one tricolor. Normally printers require both cartridges are properly installed in order to work well, but only go to print in black and white.


Before you begin, you keep the printer ready to print. Once we have connected the printer is on, follow these steps:


  • Lift the scanner cover as shown in the image.
change cartridges canon MP230
Source: Canon.es


  • Remove the cartridges holding fins cartridges and uploading them.
  • Open the new cartridge by removing all seals (remember not to touch any connector).
  • We insert the new cartridge (each in place) until it engages with a slight click.
change cartridges Canon MP230
Source: Canon.es


  • Put down the printer cover and voila!


These steps also serve you to change cartridges following printers:

Canon Pixma iP2700 Canon Pixma iP2702, Canon Pixma MP230, Canon Pixma MP235, Canon Pixma MP240, Canon Pixma MP250, Canon Pixma MP252, Canon Pixma MP260, Canon Pixma MP270, Canon Pixma MP272, Canon Pixma MP280, Canon Pixma MP282, Canon Pixma MP480, MP490 Canon Pixma Canon Pixma MP492, Pixma MP495 Canon, Canon Pixma MP499, Canon Pixma MX320, Pixma MX330 Canon, Canon Pixma MX340, Pixma MX350 Canon, Canon Pixma MX360, MX410 and Canon Pixma MX420 Canon Pixma.


Look at the original post in Consejos Impresoras

Lock lever Brother printer ink

Home >> Help >> Lock Lever Brother printer ink

Lock lever in the Brother printer ink

Locking lever ink component Brother printers inkjet

Brother inkjet printers


One of the things most characteristic of inkjet printers Brother are locking levers ink. These levers make the lock function so that the ink cartridge is securely so you can print correctly.


Many times to see if an ink cartridge of a Brother printer is installed correctly, not only to look at the LCD screen printer can know. There is another more rudimentary formula, perhaps less known, that is the "click" sounds by the lock lever to push the printer ink cartridge in the slot intended for the Brother color printer.

Brother locking lever


In the ink cartridges Brother, loose, without placing the printer in its original packaging, usually also includes a part that can not be entered into the printer and a new lever, but in this case release the ink cartridge .

Once you take out the ink cartridge Brother your bag, you'll notice as one of the ends of the leaves ink cartridge, there is a piece of plastic that must be removed as shown in the illustration below. It is essential rotate the lever in the direction of clockwise so that the ink outlet is clean and unobstructed, and once this happens, you can take the plastic part without difficulty to be installed on the Brother printer.

Brother locking lever


Look at the original post in Consejos Impresoras