Showing posts with label cleaning test. Show all posts

Wednesday, 8 June 2016

Print test page HP - HP Printers (Part 1)

Printer Blog >> Help >> Print Test Page - HP Printers


Getting a test print


How to print a test print, print cleaning page or alignment test.


Many times we need to know certain information from the printer and how many copies printed, the first time it was installed, the firmware version, serial number, etc.

Depending on the model you have, even if it is the same brand, the information you see is different but usually necessary.

We have compiled several models or series of HP printers showing step by step how you can take the test print, the cleaning test or alignment test.


HP Deskjet 400 series


HP Deskjet 400, 400L and HP Deskjet HP Deskjet 420c
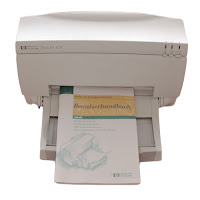

HP Deskjet 420c

Print Test Page


  • Make sure the printer is turned off
  • Click the button "Paper Feed" or "Paper feed"
  • Now turn on the printer while holding down the button
  • Sole button "Paper Feed", the printer will start printing the page.


Print cleaning test

  • Turn on the printer normally
  • Press the button "Change Cartridge" or "Change cartridge" and hold it down for approximately 5 seconds.
  • The printer will run a clean test.


HP Deskjet 500 series


HP Deskjet 500, Deskjet 500c HP, HP Deskjet 520, HP Deskjet 550c and HP Deskjet 560c
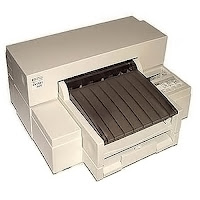

HP Deskjet 500

Print Test Page

  • Turn off the printer
  • Press the "Load / Eject Paper" button while you turn the printer back on.
  • When all the lights go out, release the button.
  • The printer prints three test pages.


Print page cleaning test


  • Turn on the printer normally
  • Click the "Clean" or "Clear" button and a page is printed to check the quality of prints.


Print page alignment test


  • We check that the printer is on
  • Press the "Test Alignment" or "Alignment Test" button.

HP Deskjet 540


Print Test Page


  • Turn on the printer
  • Press the "Resume" or "Resume" button until the printer starts printing the test page.


Print page cleaning test


  • With the printer press the "On" or "Power" button and hold it down.
  • Now press the "Resume" or "Resume" button 7 times.
  • Release the button "Power".


Print diagnostic test:

REGULAR


  • With the printer on, press and hold the button "Power" or "Power"
  • Now press the "Resume" button or "Resume" 5 times
  • Release the power button


EXPANDED
-> Same steps but pressing the "Resume" button 12 times

KEEP GOING
-> Same steps but pressing the "Resume" button 10 times


HP Deskjet 600 series


HP Deskjet 600 HP Deskjet 600c, HP Deskjet 610c, HP Deskjet 630c, HP Deskjet 632c, HP Deskjet 640c, HP Deskjet 642c, HP Deskjet 648c, HP Deskjet 660c, HP Deskjet 670c, HP Deskjet 680c, HP Deskjet 680c and HP Deskjet 690c
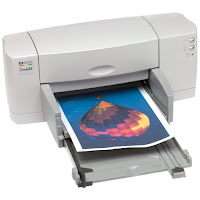
HP Deskjet 600
Print Test Page


  • Turn on the printer
  • Hold down the "Resume" or "Resume" button until you hear the printer starts printing
  • Release the button.


Print page cleaning test


  • With the printer on, press and hold the "Power" button or "Power"
  • Press the "Resume" button or "Resume" 7 times
  • Release the "Power" button.


Print diagnostic test:

REGULAR


  • Make sure you have the printer on
  • Press and hold the "Power" button or "Power"
  • Press the "Resume" button or "Resume" 5 times
  • Release the "Power" button


EXTENDED
-> Same steps but pressing the "Resume" button 12 times


HP Deskjet 700 series


HP Deskjet 710c and 720c HP Deskjet
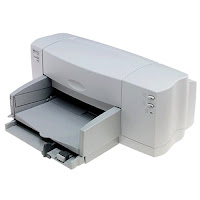
HP Deskjet 720c
Print Test Page


  • Turn on the printer and hold the "Power" button or "Power"
  • Press the "Resume" button or "Resume" 4 times
  • Release the "Power" button

Tuesday, 24 May 2016

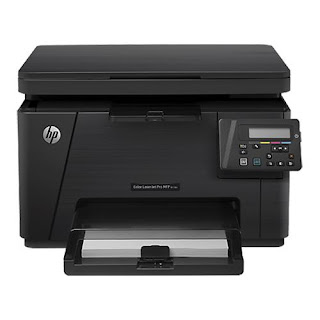
Printer cleaning HP Laserjet Pro M176 MFP

Printer Blog > Help >> Printer cleaning HP Laserjet Pro M176 MFP


Printer cleaning HP Laserjet Pro M176 MFP


Cleaning the HP Laserjet Pro M176 MFP Printer


This HP printer is a semi-professional printer that offers very good performance. If we continue to maintain print quality over time and the printer last us many years, vece have to perform a series of cleanings.

Then you leave the instructions recommended by the manufacturer to keep about your printer as the first day!


HP Laserjet Pro MFP M176


Print page Cleaning


As mentioned in another post, laser printers, with use, they are "smearing" inside the remains of toner powder. We must bear in mind that the toner powder is a very fine powder and can fit through any crack or hole of the printer. Sometimes, you can stay on the rollers and we can cause problems with print quality as spots, dots, stripes, lines, etc.

In order to solve this, we will print with the printer cleaning page.

  • In the control panel of your printer, press "Settings"
  • In the menu that opens, select "Service"
  • Now we choose "Cleaning Mode"
  • Load A4 size plain paper when prompted printer
  • Give the "OK" button and wait for the printer to remove the cleaning page.
  • When finished it will ask you to take back the sheet and reload it into the input tray with the same orientation.
  • Wait until you finish making the process and you can and discard the page.


Other times, it can happen that copies or scans leave us with little dots or fluffs that are unattractive to our impressions. This can deverse to the scanner may have accumulated dust or dirt and is affecting performance. To clean it, follow the steps listed you.


Clean the scanner

Turn off the printer and disconnect it from the power cord to make sure it is turned off at all times.
Open the scanner lid and clean both the glass and the white plastic that is on the top with a cloth or sponge very soft and slightly dampened with glass cleaner. (Do not use abrasives as acetone, ammonia, alcohol and the like).
While dry glass and plastic with a dry lint-free cloth.
Connect the printer again and try to scan or copy something, go! You have your impeccable printer!


These steps are also valid for the HP Laserjet printer Pro MFP M177


Source: 

Saturday, 16 April 2016

Printer cleaning HP Laserjet Pro M176 MFP

Home >> Help >> Printer Cleaning MFP HP LaserJet Pro M176


Printer cleaning HP Laserjet Pro M176 MFP


How to clean the HP Laserjet Pro M176 MFP printer


HP Laserjet Pro MFP M176
This HP printer is a semi-professional printer that offers very good performance. If we continue to maintain print quality over time and the printer last us many years, vece have to perform a series of cleanings.

Then you leave the instructions recommended by the manufacturer to keep about your printer as the first day!


Print page Cleaning


As mentioned in another post, laser printers, with use, they are "smearing" inside the remains of toner powder. We must bear in mind that the toner powder is a very fine powder and can fit through any crack or hole of the printer. Sometimes, you can stay on the rollers and we can cause problems with print quality as spots, dots, stripes, lines, etc.

In order to solve this, we will print with the printer cleaning page.

  • In the control panel of your printer, press "Settings"
  • In the menu that opens, select "Service"
  • Now we choose "Cleaning Mode"
  • Load A4 size plain paper when prompted printer
  • Give the "OK" button and wait for the printer to remove the cleaning page.
  • When finished it will ask you to take back the sheet and reload it into the input tray with the same orientation.
  • Wait until you finish making the process and you can and discard the page.


Other times, it can happen that copies or scans leave us with little dots or fluffs that are unattractive to our impressions. This can deverse to the scanner may have accumulated dust or dirt and is affecting performance. To clean it, follow the steps listed you.


Clean the scanner

  • Turn off the printer and disconnect it from the power cord to make sure it is turned off at all times.
  • Open the scanner lid and clean both the glass and the white plastic that is on the top with a cloth or sponge very soft and slightly dampened with glass cleaner. (Do not use abrasives as acetone, ammonia, alcohol and the like).
  • While dry glass and plastic with a dry lint-free cloth.
  • Connect the printer again and try to scan or copy something, go! You have your impeccable printer!


These steps are also valid for the HP Laserjet printer Pro MFP M177


Look at the original post in Consejos Impresoras