Wednesday, 6 July 2016

Steps to reset printers Brother HL

Home >> Help >> Reset Printer Brother HL-2030, HL-2040 and HL-2070


Steps to reset printers Brother HL:


Brother HL

Brother HL Reset - Tips Printers


Brother HL-2030
Brother HL-2040
Brother HL-2070
Brother HL-2130
Brother HL-2135
Brother HL-2250
Brother HL-2270
Brother HL-2230
Brother HL-2240


Error toner solution "Replace Toner".


If you bought a new toner for your Brother HL install printer and you get a message similar to "Replace Toner", "Replace Toner" or "Error toner" can solve the problem by performing the steps we leave you then. Brother laser printer not usually give many problems with toners, although sometimes that can happen if you do not detect the toner properly.


IMPORTANT: Before you start doing anything, we recommend you read carefully all realízalos steps and then gradually without skipping any of them. If you believe that you have not done correctly or you could skip any steps, turn the printer off, desenchúfala current about 30 seconds, reconnect it and start again.


You are ready? Well ... here we come!


Step 1. Turn off the printer: on some models switch the printer is in the back or side. If in doubt, look in the manual for your printer.

Step 2. Open the front cover where the toner is (the toner has to be entered correctly, simply leave the lid open).

Step 3. Turn on the printer while holding the "GO" button pressed until all lights remain on.


Reset Brother - Tips printers


Step 4. We press the "GO" button 2 times and wait a few seconds.
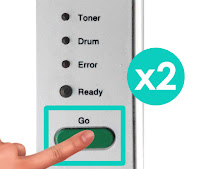

Reset Brother - Tips printers
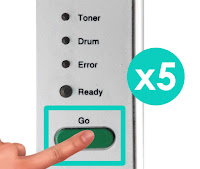
Step 5. We press the "GO" 5 times. Button Toner light must be turned off and turned on the light paper.


Reset Brother - Tips printers
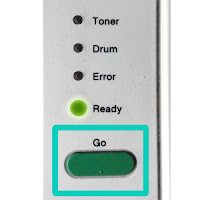
Step 6. We close the toner cover and light "ready" should stay on.


Reset Brother - Tips printers

If after the reset you get not print, turn the printer off and on again.

In some cases it can indicate a similar message as "change toner" or "toner low" even if you have not printed enough leaves to exhaust it, in that case we recommend that you try to reset the toner manually.


Look at the original post in Consejos Impresoras

Wednesday, 8 June 2016

Print Test Page HP-HP Printers (Part 2)

Printer Blog >> Help >> Print Test Page HP-HP Printers (Part 2)


Getting a test print


How to print a test print, print cleaning page or alignment test.


We continue our list of the steps we must take to make the most of our printer knowing their status. Continuing the previous post of test pages HP printers, we leave you with instructions on how to make reports, cleaning pages, etc., in some models of HP.

If you can not find your printer model, check out the listings we have done previously:


HP Deskjet 800 series


HP Deskjet 820c

HP Deskjet 820c

Print Test Page


  • Make sure the printer is turned on properly.
  • Now, press and hold the "Power" or "Power" button.
  • Press the "Resume" or "Resume" button 4 times.
  • Release the Power button.


HP Deskjet 810, Deskjet 825c HP, HP Deskjet 830c, HP Deskjet 840c, HP Deskjet 845c, HP Deskjet 880c and 895c HP Deskjet.


HP Deskjet 840c
Print Test Page

  • With the printer press and hold the "Resume" or "Summary" button until you see the printer starts printing.
  • Release the button.


Print diagnostic test


  • Turn on the printer.
  • Hold the button "Power" or "Power" while pressing "Resume" or "resume" four times.
  • Release the button "Power".


HP Deskjet 850c, HP Deskjet 870c and 890c HP Deskjet.
HP Deskjet 870c

Print Test Page


  • Turn on the printer and lets down the "Resume" or "Resume" button.
  • When the printer starts printing, release the button.


Print page cleaning test


  • Turn on the printer and lets down the "On" or "Power" button.
  • Now press the "Resume" or "Resume" button 7 times.
  • Release the button "Power".


Print diagnostic test


  • With the printer on, press and hold the "On" or "Power" button.
  • Press the "Resume" or "Resume" button five times.
  • Release the button "Power".


HP Deskjet 900c


HP Deskjet 916c, HP Deskjet 920c, HP Deskjet 930c, HP Deskjet 940c, HP Deskjet c950c, HP Deskjet 960c, HP Deskjet 970c, HP Deskjet 980c and 990c HP Deskjet.


Print Test Page


HP Deskjet 930c
  • Make sure you have the printer on
  • Now let down the "Resume" or "Resume" button until the printer starts to make an impression.
  • Release the button.


Print page Self Test


  • With the printer press the "On" or "Power" button and hold it down.
  • Now press the "Resume" or "Resume" button 4 times.
  • Release the button "Power".


Print diagnostic test


  • Turn on the printer
  • Hold the "Power" or "Power" button.
  • Now press the button "Cancel" (X) 8 times.
  • Press the "Resume" or "Resume" button 4 times.
  • Now you can release the button "Power".


Print test module duplexing (duplex)


  • With the printer turned on hold the "Power" or "Power" button.
  • Click the "Cancel" (X) button 3 times.
  • Press the "Resume" or "Resume" button 1 time.
  • Release the button "Power".


HP Deskjet 3000 series


HP Deskjet 3000, HP Deskjet 3100, HP Deskjet 3200, HP Deskjet 3300, HP Deskjet 3400, HP Deskjet 3500, HP Deskjet 3600, HP Deskjet 3700, HP Deskjet 3800 and HP Deskjet 3900.

HP Deskjet 3500

Print diagnostic test


  • Now turn on the printer and press and hold down the button "Power" or "Power".
  • Open and close the top cover 4 times.
  • Release the button "Power".


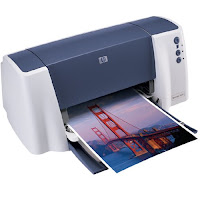
HP Deskjet 3820

HP Deskjet 3820
Print Test Page


  • Turn on the printer.
  • Hold down the "Resume" or "Resume" button until you see the printer starts printing.
  • Release the button.


Print page Self Test


  • Already on the printer, press and hold the button "Power" or "Power".
  • Now press the "Resume" or "Resume" button 4 times.
  • Release the button "Power".


HP Deskjet 5000 series


HP Deskjet 5000 series

HP Deskjet 5520

Print Test Page


  • Turn on the printer
  • Hold down the "Resume" or "Resume" button and wait until the printer starts printing.
  • Release the button.


Print page Self Test


  • Make sure you have the printer on.
  • Now let down the "On" or "Power" and while button press 4 times the "Resume" or "Resume" button.
  • Release the button "Power".


Print Test Page "H" continua


  • Turn on the printer and hold the button "Power" or "Power".
  • Press the button "Resume" or "Resume 8 times.
  • Release the button "Power".


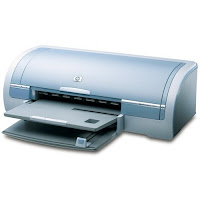
HP Deskjet 5100

HP Deskjet 5100
Print Test Page


  • Turn on the printer.
  • Press the "On" or "Power" button and let down.
  • Press the "Resume" or "Resume" button 4 times.
  • Release the button "Power".


Print test page HP - HP Printers (Part 1)

Printer Blog >> Help >> Print Test Page - HP Printers


Getting a test print


How to print a test print, print cleaning page or alignment test.


Many times we need to know certain information from the printer and how many copies printed, the first time it was installed, the firmware version, serial number, etc.

Depending on the model you have, even if it is the same brand, the information you see is different but usually necessary.

We have compiled several models or series of HP printers showing step by step how you can take the test print, the cleaning test or alignment test.


HP Deskjet 400 series


HP Deskjet 400, 400L and HP Deskjet HP Deskjet 420c


HP Deskjet 420c

Print Test Page


  • Make sure the printer is turned off
  • Click the button "Paper Feed" or "Paper feed"
  • Now turn on the printer while holding down the button
  • Sole button "Paper Feed", the printer will start printing the page.


Print cleaning test

  • Turn on the printer normally
  • Press the button "Change Cartridge" or "Change cartridge" and hold it down for approximately 5 seconds.
  • The printer will run a clean test.


HP Deskjet 500 series


HP Deskjet 500, Deskjet 500c HP, HP Deskjet 520, HP Deskjet 550c and HP Deskjet 560c


HP Deskjet 500

Print Test Page

  • Turn off the printer
  • Press the "Load / Eject Paper" button while you turn the printer back on.
  • When all the lights go out, release the button.
  • The printer prints three test pages.


Print page cleaning test


  • Turn on the printer normally
  • Click the "Clean" or "Clear" button and a page is printed to check the quality of prints.


Print page alignment test


  • We check that the printer is on
  • Press the "Test Alignment" or "Alignment Test" button.

HP Deskjet 540


Print Test Page


  • Turn on the printer
  • Press the "Resume" or "Resume" button until the printer starts printing the test page.


Print page cleaning test


  • With the printer press the "On" or "Power" button and hold it down.
  • Now press the "Resume" or "Resume" button 7 times.
  • Release the button "Power".


Print diagnostic test:

REGULAR


  • With the printer on, press and hold the button "Power" or "Power"
  • Now press the "Resume" button or "Resume" 5 times
  • Release the power button


EXPANDED
-> Same steps but pressing the "Resume" button 12 times

KEEP GOING
-> Same steps but pressing the "Resume" button 10 times


HP Deskjet 600 series


HP Deskjet 600 HP Deskjet 600c, HP Deskjet 610c, HP Deskjet 630c, HP Deskjet 632c, HP Deskjet 640c, HP Deskjet 642c, HP Deskjet 648c, HP Deskjet 660c, HP Deskjet 670c, HP Deskjet 680c, HP Deskjet 680c and HP Deskjet 690c
HP Deskjet 600
Print Test Page


  • Turn on the printer
  • Hold down the "Resume" or "Resume" button until you hear the printer starts printing
  • Release the button.


Print page cleaning test


  • With the printer on, press and hold the "Power" button or "Power"
  • Press the "Resume" button or "Resume" 7 times
  • Release the "Power" button.


Print diagnostic test:

REGULAR


  • Make sure you have the printer on
  • Press and hold the "Power" button or "Power"
  • Press the "Resume" button or "Resume" 5 times
  • Release the "Power" button


EXTENDED
-> Same steps but pressing the "Resume" button 12 times


HP Deskjet 700 series


HP Deskjet 710c and 720c HP Deskjet
HP Deskjet 720c
Print Test Page


  • Turn on the printer and hold the "Power" button or "Power"
  • Press the "Resume" button or "Resume" 4 times
  • Release the "Power" button

Wednesday, 1 June 2016

Change cartridges HP Deskjet 1000 series

Printer Blog >> Help >> Change cartridges HP Deskjet 1000 series

HP Deskjet 1000 series


Change printer cartridges HP Deskjet 1000, Deskjet 1010, Deskjet 1050, Deskjet 1510, Deskjet 1512, Deskjet 1515.

To change printer cartridges HP Deskjet 1000 series you can follow the instructions in the manual that includes or perform the following steps:


Hp Deskjet 1050

Steps to change the ink cartridges


  • Verify that the printer is connected and that paper. In order to change the printer cartridge correctly must be like if you were to print.
  • Open the cartridge door is at the front. You will see that the car with the cartridges will begin to move to move to the center. Expected to stay standing in the center to remove the cartridges.
  • Press down the cartridge gently until you feel disengages. Sometimes it takes a bit but can usually be easily removed, I remove it from its slot.
  • Open the new cartridge and carefully remove the protective tape. This usually takes a striking and directions on how to remove color. It serves to protect the head cartridge because in these models is integrated. Try not touch the head or contacts, as dirt can cause the cartridge to malfunction.
  • Insert the new cartridge until you hear a click. Make sure you're getting in the right place. If you're trying to get the cartridge and see that you do not fit, try to get him into the next slot because it can not be that your site :-).
  • Close the cartridge door and wait for the printer to perform their "homework".


Once installed a new cartridge, it is best to take out a print test to verify that it works correctly.

More accurate impression you would like shown below:

Print test HP Deskjet 1000


If you have left you with some color spots or it does not work, then you have to perform head cleaning with printer software or manually.

Remember these steps to clean the heads dela HP printer used for the following models:
HP Deskjet 1000, Deskjet 1010, Deskjet 1050, Deskjet 1510, Deskjet 1512, Deskjet 1515.


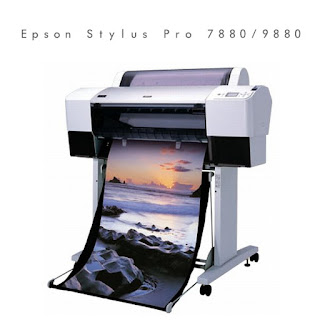
How to install the ink cartridges in the Epson Stylus Pro 7880/9880


Printer Blog >> Help >> How to install the ink cartridges in the Epson Stylus Pro 7880/9880

How to install the ink cartridges in the Epson Stylus Pro 7880/9880


Steps to install the ink cartridges


Epson Stylus Pro 7880/9880Today we'll try to help install the ink cartridges in the Epson Stylus Pro 7880 printer and plotter 9880. These are for professional use and are very well received by those who are engaged in the printing of posters, brochures, etc. Epson offers very good picture quality in almost all printers thanks to the technology used in their cartridges and ink type.

If you are printing large jobs it is better check before the ink levels because you can stay with the job half done, unless you have a replacement cartridge.


When i have to change the ink cartridge?

Thanks to the LCD screen of these plotters can see the 8 slots corresponding to each of the ink cartridges indicating percentage of remaining ink. When the red ink (teardrop) is flashing and the message that "low on ink" is when you have to start preparing a replacement cartridge appears on the screen.
When the red light is on permanently on the screen the message you replace the cartridge so it is displayed when you have to replace it


How to change the ink cartridge


  • The first thing you have to do is give the power button.
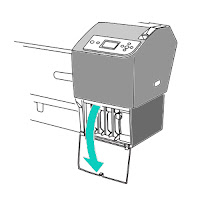
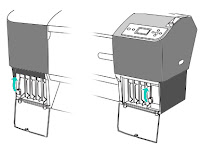
  • Then you must open the cover of the ink cartridges down and up the levers up to unlock the cartridges.


Epson Stylus Pro 7880/9880 change cartridgesEpson Stylus Pro 7880/9880 change cartridges

Source: https://files.support.epson.com/pdf/pro7880/pro7880gd6.pdf

  • Remove the ink cartridge in the printer that are about to change.
  • Take out the new ink cartridge from its packaging and shake.
  • Epson Stylus Pro 7880/9880 change cartridges
  • Source: https://files.support.epson.com/pdf/pro7880/pro7880gd6.pdf
  • Insert the ink cartridge and verify that the printer has detected across the LCD.
  • After installing the ink cartridge, lower the ink lever. The printer starts charging the ink delivery system and the power indicator is flashing.

That is all! We have prepared our plotter to print our wonderful work!


Original post: Cómo instalar los cartuchos de tinta en la Epson Stylus Pro 7880/9880

Reset Toner Brother MFC series


Printer Blog >> Help >> Reset Toner Brother MFC series

Brother MFC printer toner reset


Problem: The printer does not recognize the toner


Brother MFC
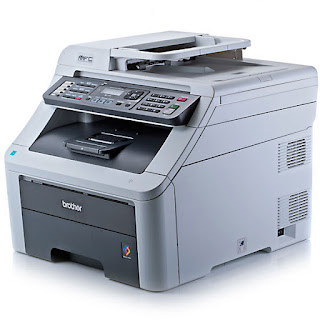
Brother MFCA can sometimes happen that when installing the printer toner will launch messages such as "Replace Toner" or "Out of toner" or simply "toner error". Do not worry, it is relatively common to occur in Brother printers when you install a toner that is not the manufacturer's brand.

In this case, the solution is quite simple. First we recommend you try to make toner restart before proceeding with the steps listed below you.


If the steps you still has problems, try to do the following after performing:


  1. Open the front cover of the printer (where the toner is introduced)
  2. On the printer display you will get a message like "Front cover open" or "Cover Open".
  3. Press the "CLEAR" or "DELETE" button.
  4. A beep sounds in the printer and the display appears the message "Replace Drum?"
  5. Click on the following combination * 00 numeric keypad and press the "ENTER" button.
  6. Close the front cover, the printer will restart.
  7. If after you reset the printer toner still has problems, try uninstalling the printer and reinstall it again. Optimally, in these cases, is that again install the software CD that comes with the printer, if not, you can download the driver from the official website of Brother.


Why does this happen?


As discussed above, it is relatively common to happen with Brother laser printers. Some printer models have an internal page counter printers that are renewed as the consumable is changed. Sometimes this is not done automatically reboot and the printer does not recognize the toner as brand new or you fail. That is why, so it is necessary to inform the printer that you have installed a new consumable and you have to start counting from zero.

These steps pose no risk to the printer, so if we recommend is that you read completely before starting to perform them.


What if it does not recognize the toner?


If you're still having problems despite this, it is best that you contact the store that supplied the toner because you may simply this is defective and replace it with a new one you can print normally.


Tuesday, 24 May 2016

What is a maintenance cartridge?

Printer Blog >> FAQ >> What is a maintenance cartridge?

Maintenance Cartridge


Maintenance cartridge description

Cartridge maintenance is a piece of laser printers that is responsible for collecting the toner remaining after the prints.
maintenance cartridge
cartucho de mantenimiento

For those who have a laser printer, once you've heard of the maintenance cartridge. Not all laser printers have them, but most large-format, ie, large printers as CANON IPF 6300, have this piece apart.


What is the function of a cartridge maintenance?


The maintenance cartridge is a part of some laser printers that is responsible for collecting the excess toner is ejected when printing. This piece, with use, there comes a time when it is filled.


Epson maintenance cartridge C13S020476


Thanks to sensors that are included, the printer itself detect when the maintenance cartridge is full, and then have to change it.

Tips printers will teach you more things about parts printers.


Source: